
The Fall weather is finally upon us here in Austin, TX which means I've been pulling out all of our Fall decorations and searching high and low for all the pumpkins.
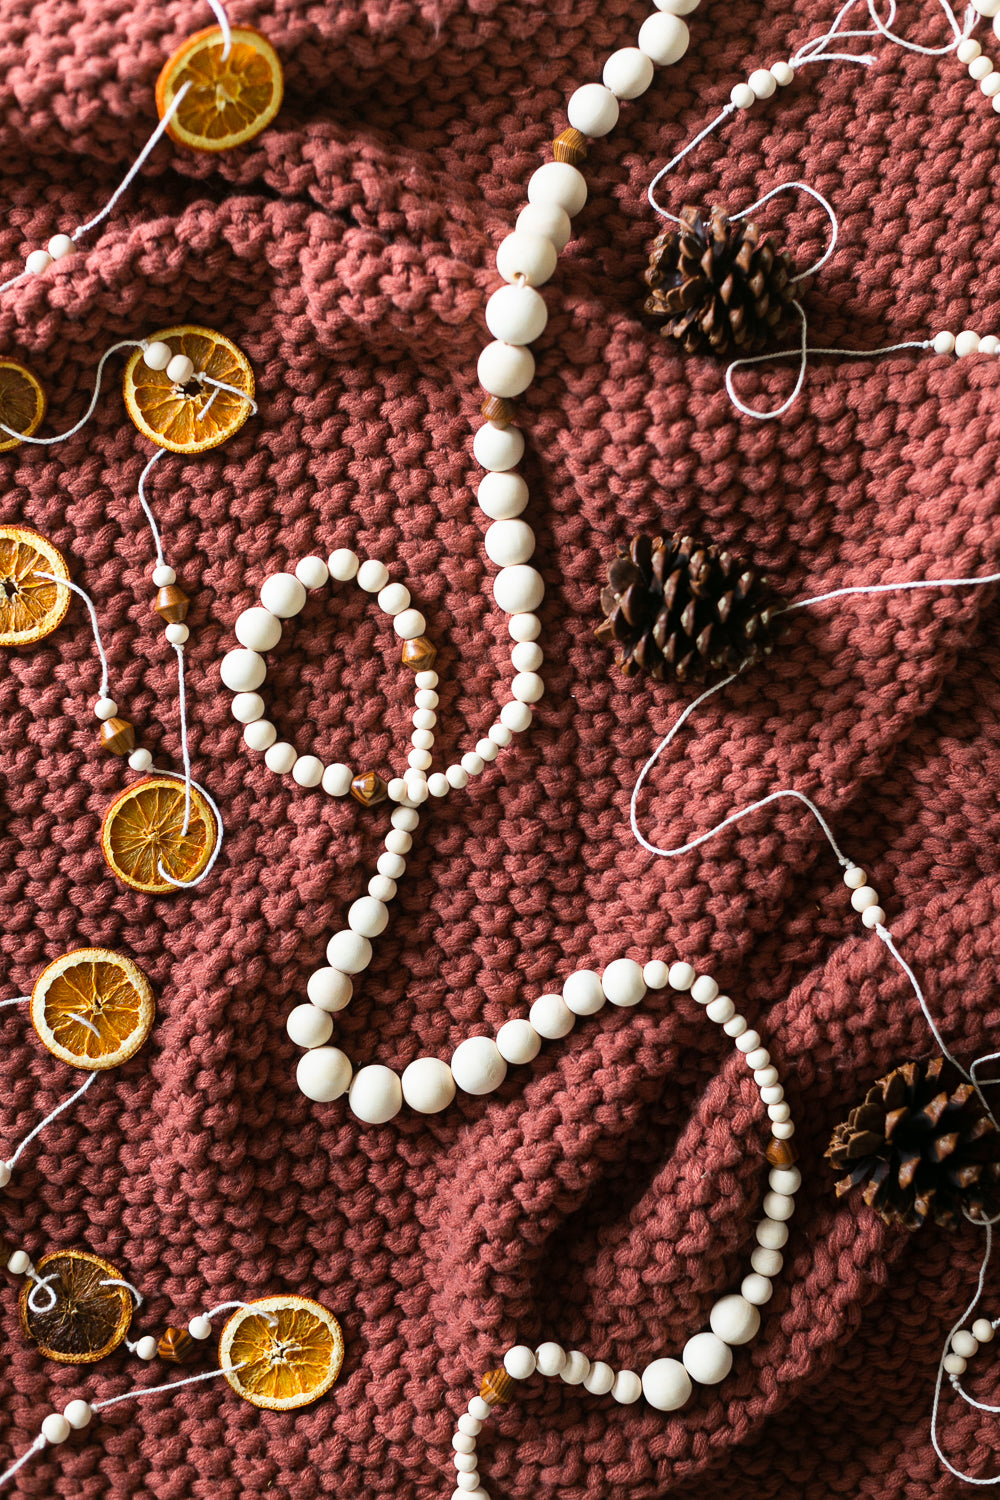
Our mantle is by far one of my very favorite places in our house. It's the center of our home and we just finished renovating it last summer so it's one of my favorite spots to decorate and show off. Anyone else love some good mantle decor?? I decided to make three garlands to drape over the space this year: a beaded garland, a pine cone garland, and a dried orange garland. They were so easy and what I love is that you can make these your own by doing different patterns, more pine cones, more or less oranges, etc. Below you will find a little tutorial on how I did mine!
Shopping List:
- oranges
- I bought 4 oranges and chose to spread mine apart on my garland. If you want them closer together, I would buy more!
- Also keep in mind that they shrink when you are drying them! So if you want larger slices, get the large oranges instead of the small (I used small!)
- Wooden beads (varying sizes, I also got some brown ones to mix in with the natural-colored ones)
- Pine cones
- twine (I chose a natural color so it wouldn't stand out against our white mantle)
- scissors

Step 1 - Dry your oranges

You will want to do this the day before you plan on making your garlands.
- Preheat your oven to 200°F and slice your oranges into 1/8" thick slices.
- Place on a baking sheet lined with parchment paper.
- Bake in the oven for about 3-4 hours and then let them sit overnight
Step 2 - Make a loop and knot on your twine

Make a loop with your twine and then tie a knot below. This will not only keep your beads, orange, etc on the twine, it will also make it easier to hang them.
Step 3 - Make your dried orange garland

For this garland, I chose to mix in beads and dried oranges - feel free to do this however you want!
- After making my loop and knot, I strung two small beads and then tied a knot to keep them in place.
- To string the orange, I made two tiny holes with the scissors and then thread the twine through the holes. Then I slid the orange into place
- I measured 2 inches from the orange and tied another little knot and strung 3 beads and tied another knot.
- I continued this pattern until it was the length I wanted for our mantle
- I ended this garland with another loop and knot!
Step 4 - Make your bead garland

This is the easiest of all the garlands! I didn't really have a rhyme or reason to how I put the beads on. I would just do small patterns and between each pattern I put a brown bead. You can do this however you want! Be sure and end your garland with another loop and knot to keep everything in place and make it easy to hang!
Step 5 - Pine Cone Garland

- After making my loop and knot for this garland, I strung three beads and then made a small knot after to keep them in place.
- Then I measured about 5-6 inches and tied a pine cone. To do this, I found the very tip of the pine cone where there were 1 or 2 spikes sticking up, wrapped the twine around and tied a knot.
- From there, I measured another 5-6 inches, tied a little knot, and then added 3 more beads followed by another small knot.
- I continued this pattern until my garland was the length I wanted
To hang these babies up, I used tiny, clear command hooks but you can also use a strong tape if you want. I also chose to put all of mine on our mantle but you can place them all around your house. The dried orange garland would actually look really cool around a front door or other doorway!


7 comments
xlNaeYTdOoX
OQuaLeGcHY
KCyLeVfISHBdUEAN
kYuZvoTWzj
rcYWabBHOTv