
With 4th of July coming up and the summer season officially here, you may have some barbecues coming up! We have been grilling in the back a bit more while the kiddos play in the sprinklers and we have plans for a big barbecue with friends later in July.
I can be hard to figure out what to bring to a barbecue. The meat is usually taken care of and you want to bring something delicious that's not incredibly hard to make. Well, friend, I've put together this blog post just for you. I have gathered, made, and tested these three recipes and all of them are perfect for your next barbecue. Whether you are bring a drink, dessert, or a side, look no further because I've got you covered.
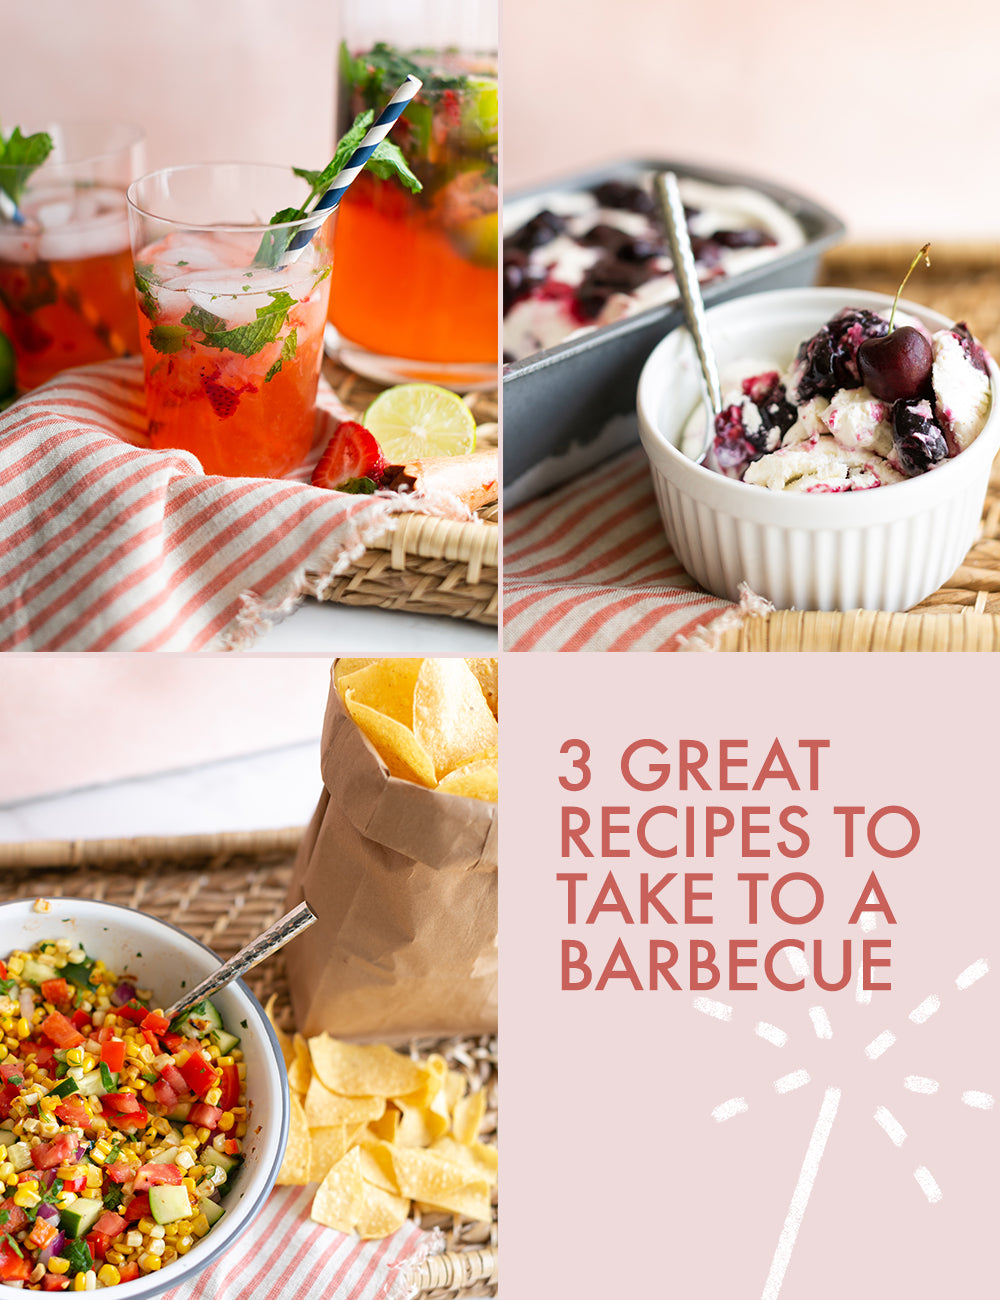
Now, this first recipe is for adults only but everyone loves a good boozy pitcher drink, am I right? I made a strawberry mojito that is super refreshing, sweet, minty and is the perfect way to cool off and relax. It has the perfect amount of white rum to where it's present but not overpowering and ooooo baby, it's so good.


STRAWBERRY MOJITO
INGREDIENTS:
- 2 limes, cut into quarters
- 10 strawberries, quartered
- 1/2 cup packed fresh mint leaves
- 1/2 cup granulated sugar
- 1 1/2 cups white rum
- 8 cups club soda
- Additional lime, strawberries, and mint, for garnish
DIRECTIONS:
- Squeeze the juice of the lime quarters into the pitcher, set the squeezed limes aside.
- Add in the strawberries, mint leaves, and sugar to the pitcher. Let sit for 5 minutes to let the strawberries release some of their juices.
- Using a muddler or a wooden spoon (I found a muddler to work best!), mash the strawberry mixture together in the bottom of the pitcher to release the flavors.
- Add in the juiced lime quarters and rum. Stir until the sugar is dissolved, then add in the club soda. Gently stir to combine.
- Pour over ice into glasses and garnish as desired.
For the side recipe, I chose something that could really be used as an appetizer or a side, so it's a win-win! This corn salsa would go great on the side of some tasty grilled chicken or steak, or you can dip some chips in it and have it as a true salsa. It's super versatile and a true crowd pleaser (our 20 month old even loved it!). The corn is cooked in the skillet first which gives it a nice smoky flavor and mixed with all the other fresh veggies and spices, all the flavors really meld together and make the perfect combo!


CORN SALSA
INGREDIENTS
- 4 ears of sweet corn
- 1 red bell pepper, diced
- 2 Roma tomatoes, diced
- 1 medium cucumber, diced
- 1/2 red onion, diced
- 1 jalapeno seeded, deveined, minced
- 1/3 cup packed cilantro, minced
- 2 tablespoons lime juice
- 1 tablespoon apple cider vinegar
- 1/2 tsp each ground cumin, salt
- 1/4 tsp each garlic powder, smoked paprika, pepper
DIRECTIONS:
- Cut the kernels off of the cob. Heat 1 tablespoon olive oil in large cast iron skillet over high heat. Add the corn and cook, stirring occasionally, until corn starts to char approximately 5-7 minutes. Transfer kernels to a large bowl.
- Add all of the remaining ingredients to the cooked corn and toss to evenly coat. Season with additional lime juice and/or salt and pepper to taste.
- Let rest for 30-60 minutes at room temperature to let the flavors meld or serve immediately. This corn salsa will keep covered in the fridge for up to 4-5 days days, but is best the first day.
Last, but definitely not least, we have the dessert. You guys. This has got to be one of my all-time favorite ice cream recipes. I've tweaked it a bit over the years to create a creamier ice cream oohhh mama, is it good. This roasted cherry & vanilla bean ice cream is a family favorite. Juicy, oven-roasted cherries mixed with cream vanilla bean ice cream - there really is no beating this. And to make it even better, it's no churn! You don't need an ice cream maker for this beauty which means it's so easy to make (WIN!).


NO CHURN ROASTED CHERRY & VANILLA BEAN ICE CREAM
INGREDIENTS:
Cherries:
- 2 cups of pitted whole cherries (I used this cherry pitter!)
- 2/3 cup granulated sugar
- 2 teaspoons corn starch
Ice Cream:
- 3 cups heavy whipping cream
- 2 tablespoons vanilla bean paste (I love this one!)
- 1 14oz can of sweetened condensed milk
DIRECTIONS;
- Preheat the oven to 400°F
- In a bowl, toss the cherries, sugar, and corn starch until the cherries are coated. Pour in a single layer onto a baking sheet.
- Place in the preheated oven and roast for 25 minutes. I take the cherries out of the oven every 10 minutes to stir them a bit to keep all the juices from burning. This also helps make sure the cherries are roasting evenly.
- While your cherries are roasting, pour the heavy whipping cream into a stand mixer fitted with a whisk attachment. Whip the heavy whipping cream until soft peaks form.
- Add the vanilla and continue whipping until stiff peaks form.
- Pour the sweetened condensed milk into the heavy whipping cream and gently fold them until combined.
- Take the cherries out of the oven and allow them to cool for about 5-10 minutes.
- Pour half of the ice cream into a loaf pan, then place half the cherries on top. Next, pour the remaining ice cream into the pan and add the remaining cherries on top.
- Place the ice cream in the freezer and allow to freeze for 6 hours or overnight.
- Scoop into bowls or on cones and enjoy!