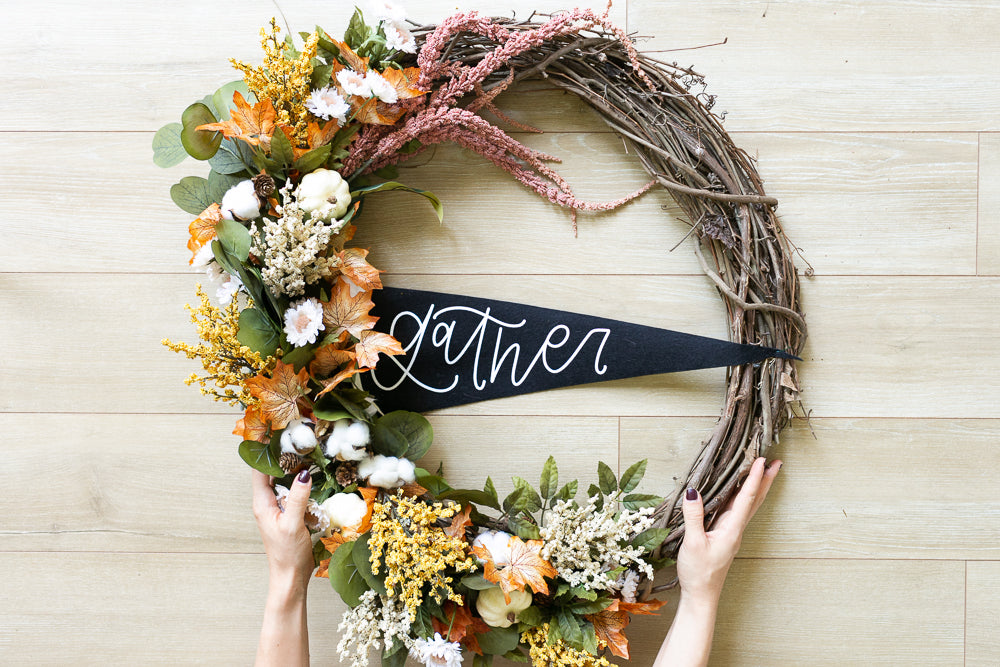
While Fall is not quite in the air yet in most places, Fall spirit is alive and well, y'all. Last week on our Instagram I asked what everyone is looking forward to most about Fall and holy moly - you are all Fall lovers and my favorite kind of people. As if I wasn't ready for Fall already, now I'm itching to bake all the pumpkin bread, jump in all the leaves, and wear a sweater that feels like a cozy blanket.
But one of my very favorite things about Fall is the decorations and setting a cozy and warm atmosphere in our home. This change in season is always a welcome one, bringing cooler weather and all the baked goods, so I feel it deserves to be properly celebrated.
The first thing I do every year is hang a wreath on our front door. Who doesn't want a door that says "Hello! Welcome! We love fall!" I also absolutely love hosting in our home (that may look a little different this year with COVID, but hey, a girl can dream), so I chose the "gather" pennant from our Fall collection. The "hello pumpkin" pennant would also be super cute (please make a wreath with one and show me so I can drool over it, cool, thanks).
I had so much fun putting this wreath together thinking about how much cheer it was going to bring to our little front porch, so I've put together a step-by-step tutorial for you on how I created this beauty.

Step 1: Buy all your materials
I stopped by our local craft store and found everything I needed:
- grapevine wreath - I love using these because they really hold everything in with all their stiff vines. This one is a 24" wreath and it's big and gorgeous
- all kinds of faux foliage - leaves, flowers, cotton with pinecones, etc.
- little foam pumpkins
- CFL Fall Pennant
- floral wire
- scissors/wire cutters
- wreath hanger
Step 2: Attach your big leaves first
The leaves are what will shape your wreath, so I like to place those first. I chose to attach the green leaves and then the orange ones throughout. The flowers I purchased also had green leaves that were removable so I added some of those for some fun texture.

Step 3: Add bulkier flowers
If I'm honest, I have no idea what you would call these white, yellow and pink bunches of flowers, but I added them next to create a really full look and get the shape I wanted before I added all the smaller, fun decorations.

Step 4: Place your smaller flowers and cotton
The cotton and flowers came in bunches so I cut them into separate stems and placed them throughout. These can be used to fill any holes you see in your wreath or places you think need a little extra somethin' somethin'.


Step 5: Add pumpkins with floral wire
The pumpkins I bought were made of foam, so I was able to easily poke wire in and then tie it to the wreath. To keep the wire from slipping out, I made a hook on the end of the wire before I poked it in so it would grab ahold of the inside and keep it from falling out. From there, I simply placed the pumpkin where I wanted, fed the wire through the wreath, and then twisted it to keep it secure.


Step 5: Attach your pennant and hang her up!
I didn't want to mess up my pennant in case I choose to hang it somewhere after I take down my wreath (like in the kitchen!), so I used the handy dandy tag that's on the back of the wreath. I put the floral wire through the tag and then thread the wire through the wreath where I wanted it to go. Twist and then you're done! If you want, you can also tie the felt pieces on the corners of the pennant to the wreath to keep those secure. For the small end of the pennant, I poked a piece of floral wire through the very end and then secured it to the wreath and voila! She's a beauty!
Hang on your front door with a wreath hanger and you're all set!


15 comments
I love this!! Where did you get all the faux foliage and foam pumpkins?
BOnjRSvYahziFuZE
kcGuJTdgC
SqlvmgHGo
EUGwFVmBj