
I have to admit, when it come to Easter decor, I'm definitely more on the minimalist side. I love adding some pretty blooming branches or some Spring-toned vases and even a Spring wreath on the door. I have also loved the wooden egg trend the past few years.
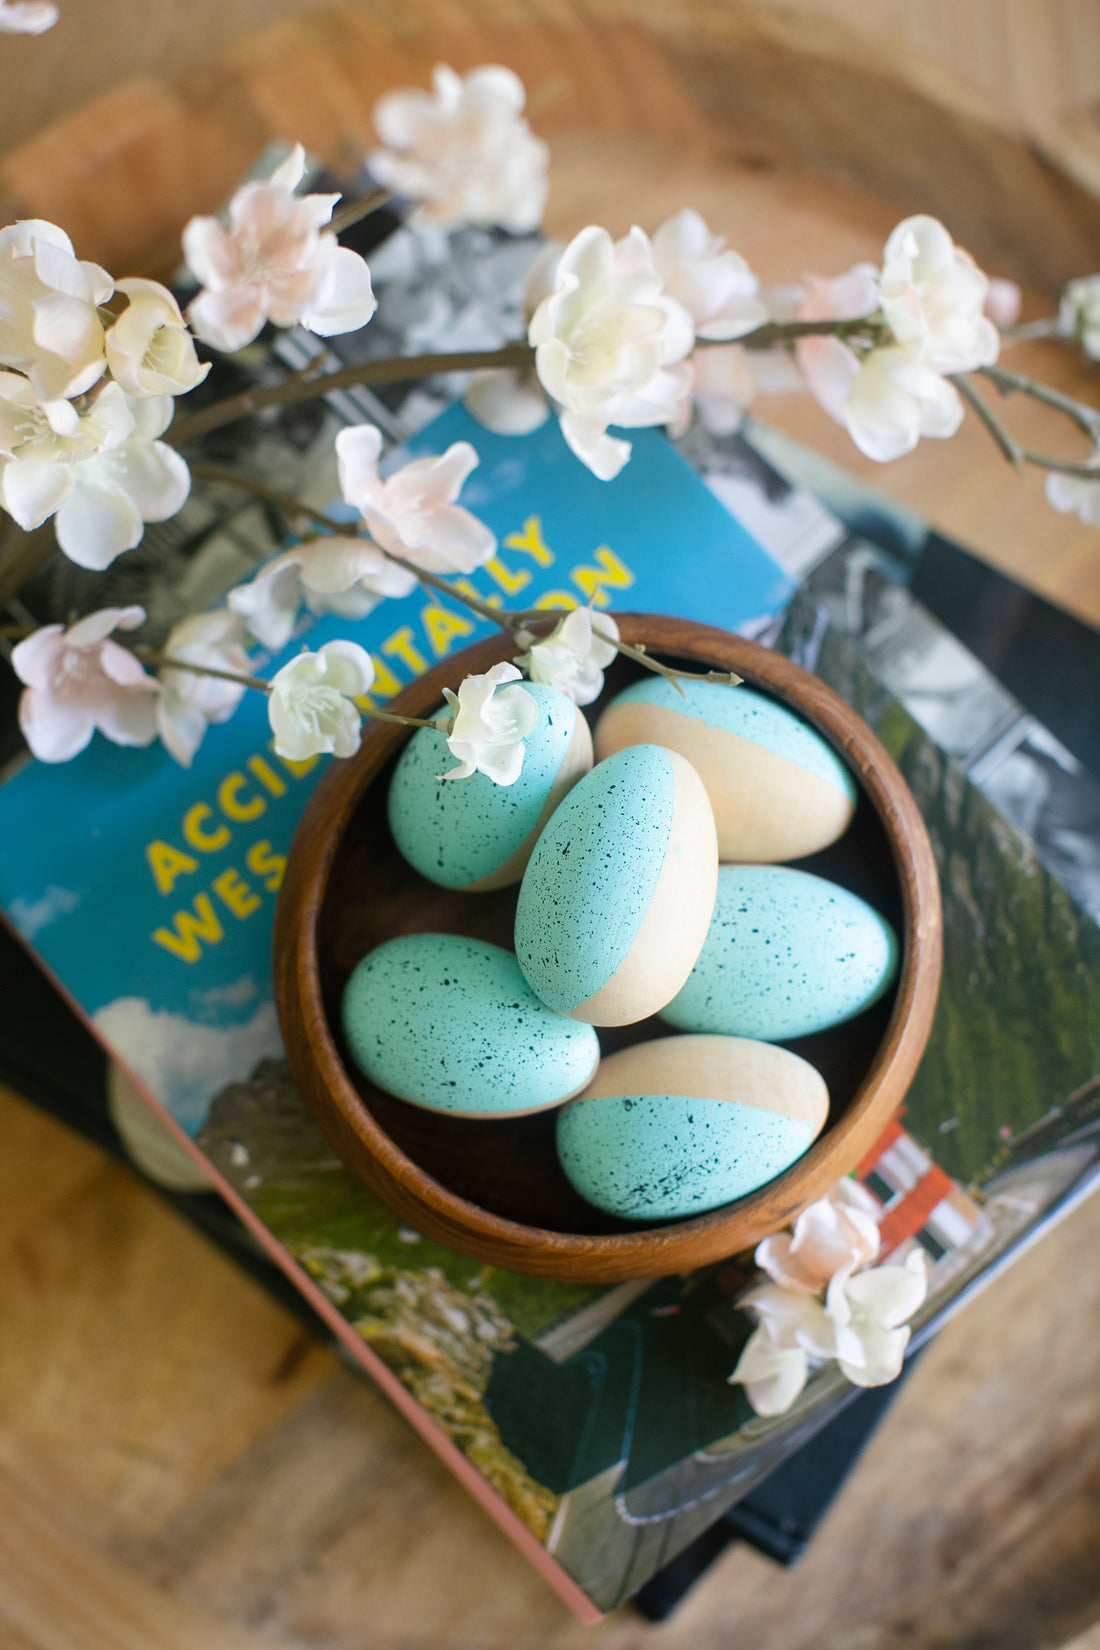
This year, I decided to spice up my wooden eggs a bit while still sticking to the minimal and somewhat modern style I love. Robin's eggs are the sweetest mint-y blue with little speckles so I decided to try and replicate that look, but on half the eggs! I used mine as filler in a wooden bowl, but these would also make a super cute addition to an Easter table whether it's as a centerpiece or on each place setting. However you choose to use them, I love the sweet Easter vibe they add!
You can find the materials & steps below along with a little video!

MATERIALS:
- Wooden eggs
- Acrylic paint (I chose a very light mint green & black)
- Paint brushes
- Painters tape
STEPS:
- Place the painters tape around each wooden egg. You can choose to do this however you like, but I chose to place the tape around it length-wise.
- Using a paintbrush, paint the mint green (or whatever base color you like) paint all over the one side of the egg. Set it aside to dry and paint the base color on all of your wooden eggs.
- Once the paint has dried, dip your other paint brush into the black paint. Make sure there is a generous amount on it. Using your fingers, pull back the hairs of the paintbrush and let them go, flicking speckles of paint onto the mint green part of the egg. Set aside to dry.
- Pull off the painters tape and place the eggs in a filler bowl or use them as cute accents to a place setting!
