
In case you missed it, our Spring Surprise Boxes went live yesterday and this year our theme is all about a fresh home. As I've mention probably a million times before, I'm so ready for Spring and have already been sprucing up my home to give it a fresh vibe.
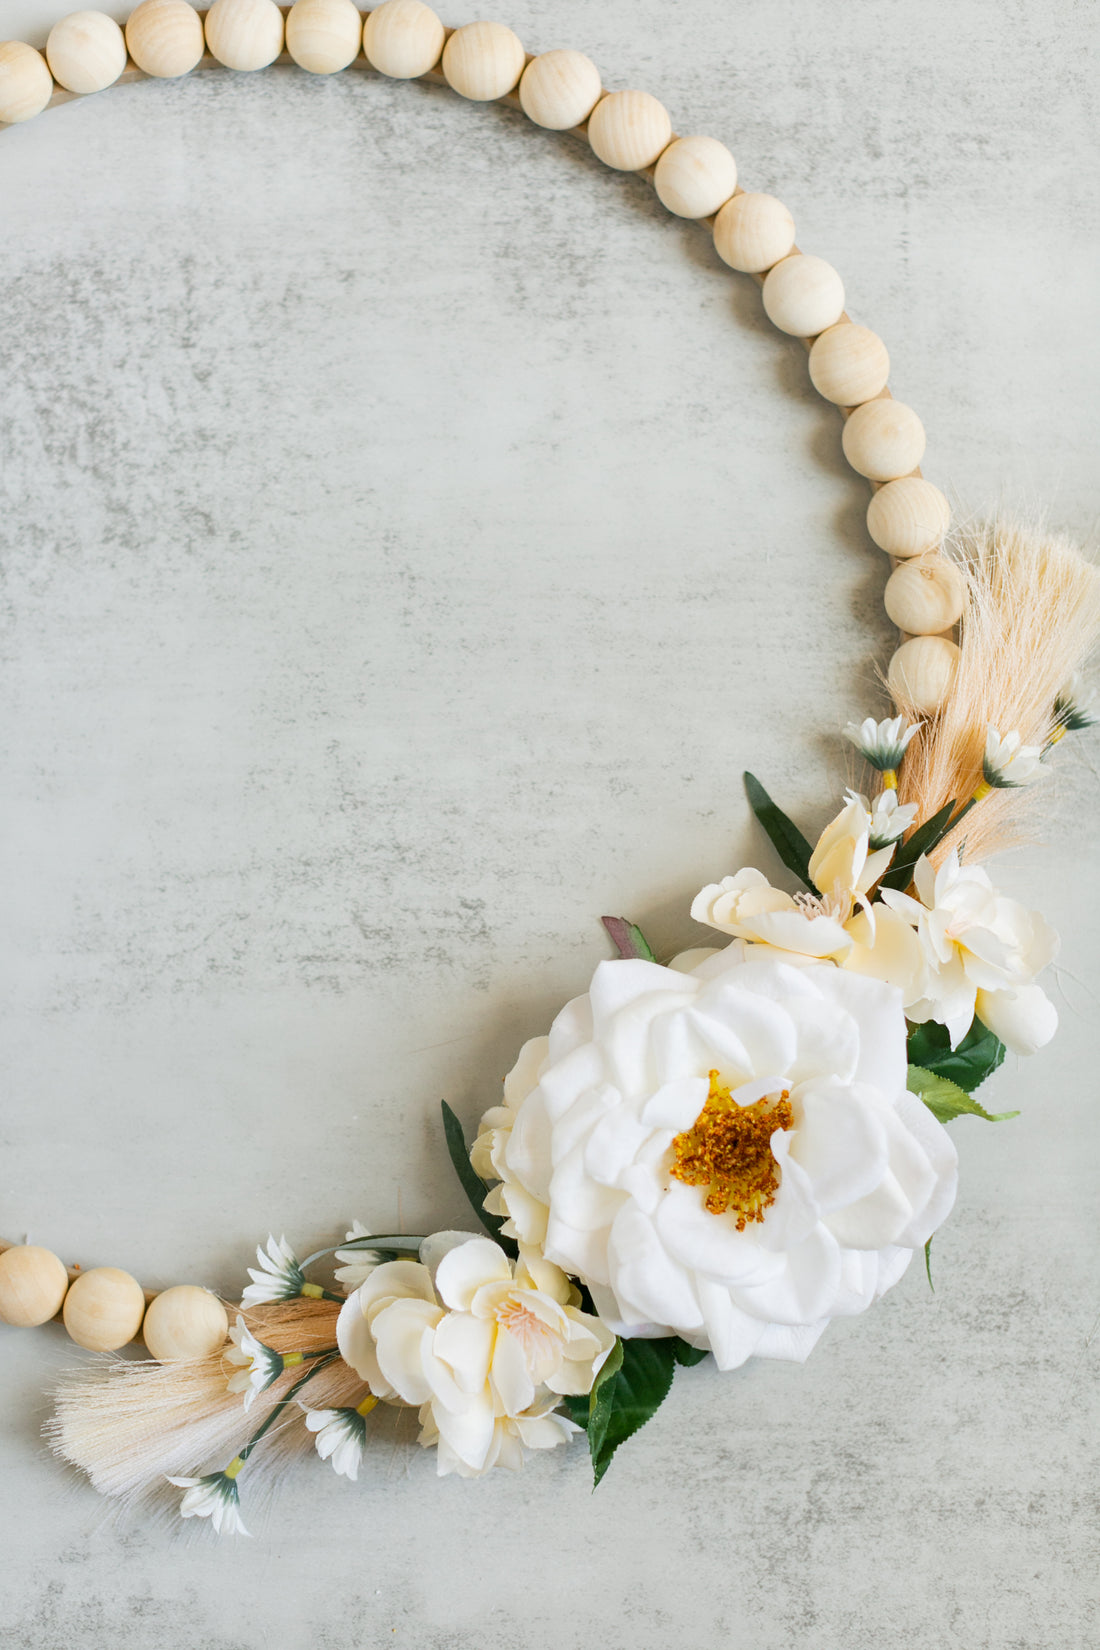
I knew I wanted something to hang on the mirror above our mantle. I hung a wreath on the mirror for Christmas and loved the texture it gave the whole space. For Spring, I decided to make a wreath of my own using wooden beads (actually half wooden beads) and florals. Nothing freshens up a home for Spring quite like flowers and I thought the wooden beads would keep it a bit minimal but also stylish and different.
Here are the materials you need:
- Half wooden beads - here are the ones I used
- 16" flat wreath circle - I used this one from Michael's
- Florals of your choice - I chose one big flower to be the focal point and then chose a variety of a couple smaller flowers and some grassy type floral for some added texture
- Scissors
- Hot glue

Steps:
- With a hot glue gun, glue your wooden beads almost all the way around the wreath circle. I left about 6-8 inches so I would have plenty of room to glue my florals.
- Start with your textured floral first. It could be a grassy floral like mine or even just some leaves. I glued these first to create the shape I wanted.
- Next, glue down your smallest flowers, then your medium flowers.
- Finally, place your big focal flower in the center and voila! You're done! I used some ribbon I already had to hang the wreath, but you could use whatever you want or even use a wreath hanger to hang it on your door!


